A map and compass should always accompany you on your hike. But do you know how to use them?
Being able to read a map helps you both plan and navigate your trip. Here is a brief introduction to using a map and compass. Remember: Practice makes perfect.
Watch the video guide: How to use a map and compass
Orienting the Map
Before you do anything else, you must align the map with the world around you.
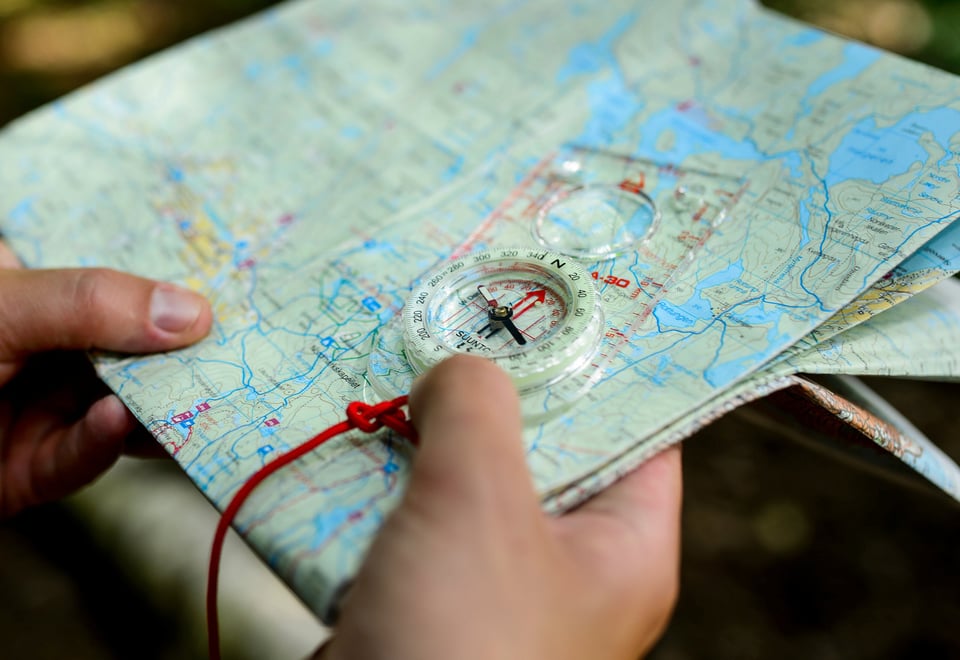
Hold the map horizontally.
Rotate the map so that the North lines (grid lines) on the map align with the North indicated by your compass needle.
Identify prominent landmarks in the terrain (peaks, lakes, or valleys) and find them on the map to confirm your exact position.
Navigating with your compass
If you know where you are (Point A) and where you want to go (Point B), follow these steps:
Set the Direction: Place the edge of the compass on the map. Create a straight line from Point A to Point B. Ensure the direction-of-travel arrow is pointing toward your destination (Point B).
Align the Housing: Keeping the baseplate still, turn the compass bezel until the orienting lines at the bottom of the housing are parallel to the North-South grid lines on the map.
Follow the Arrow: Lift the compass and hold it level in front of you. Rotate your entire body until the red magnetic needle aligns perfectly with the orienting arrow inside the housing ("Red in the Shed").
Marching: The direction-of-travel arrow is now pointing toward your goal. Pick a landmark in that direction (a specific rock or tree), walk to it, and repeat.
Understanding magnetic declination
The compass needle points towards the magnetic north pole while the map is oriented towards the geographical north pole. The difference between these two North Poles is called the misdirection. It varies depending on where you are in the country. A declination of one degree will cause you to get about 30 meters off course for every one and a half kilometers you walk.
In Norway, declination is greatest in Finnmark, with up to 11 degrees east, and up to 6 degrees west in Western Norway. In many other places, the misdirection is so small that you don't need to account for it.
If you are going to navigate by compass for several kilometers in poor visibility, you should correct the compass so as not to get off course. A misdirection of 10 degrees will cause you to miss the goal by 1200 meters on a stretch of 6 kilometers.
Declination is adjusted set on the compass after you've plotted your course. If declination is east, it is subtracted from the degree number on the compass. If it is western, it is added. Maps typically indicate the declination for that area in the area covered by the map sheet.
Where are you on the map?
Hiking maps in Norway often have a scale of 1:50,000, meaning they show less detail than specialized orienteering maps.
Contour Lines: These are your most important feature. They show the shape of the terrain and its steepness. The closer the lines, the steeper the slope.
Stay Aware: Make it a habit to check the map regularly. Identifying mountain names and features doesn't just keep you safe—it makes the hiking experience much richer.
Practice in good weather
When following marked trails on clear days, use the opportunity to practice. When the fog rolls in or a storm hits, it is too late to learn. If you lose the trail markers, knowing your position and being able to take a bearing is what will lead you safely home.